
- use a free service
- use a grant-based service
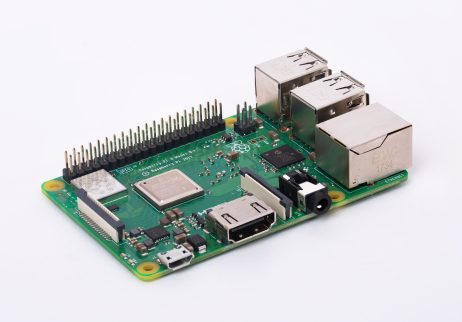
- run a server at home on a Raspberry Pi
Each have their merits, but the latter more so. Hence, why this tutorial is dedicated to showing you how to do it.
Feature request? If you'd like a template Pyramid website just drop a comment!
Scarce choices
Static vs. dynamic

Other sites, like Wix allow users to build static websites without even touching HTML code. However, if you want to run a Python script things are a bit more problematic as these serve pages whose contents is fixed. While a responsive server is called a dynamic server.
Here I will focus on Python, but this tutorial still works up to a certain point for other languages.
In terms of free services that allow python server two options are possible: Red Hat Openshift and AWS.
Openshift
The former allows a free Python server, but with the annoying condition that it goes offline every day until someone tries to access it —in which case the user times out and the server boots. Before OS v3, v2 allowed 3 free servers without this annoyance and also they used to run academic grants, which they no longer do.AWS
Amazon Web Services (AWS) is free for some things, such as a single EC3 container for a year, but it is complicated and can result is hidden bills, say to simply SSH into your server. It does offer academic grants, which are really good.Home-made
However, the best solution is not to scrounge, but to be independent.To do this three things are needed:
- A domain
- A home internet connection
- A Raspberry Pi or similar machine
Domain
A website URL has various parts. Say
http://www.example.com.http:// is the protocol. www. is the subdomain. example is the domain and .com is the top level domain. This points to an IP address. At this address lives a server (a web connected computer that serves files). Owning a domain just means you choose where it point.
Available domains can be bought at GoDaddy (or other seller) for about £10 a year depending on the top-level domain. Nobody is quite sure what the extra protection they sell means, so use your regular email to sign up for GoDaddy but just give your work address and your spam email when you buy the address.
Owning a domain means you can control subdomains and point them to different places.
Pointing means the DNS sends directly to a given IP. Forwarding means that the address redirects to another. Masking means it keeping the address by having the true page embedded instead.
In GoDaddy in Domain manager there is a subdomain forwarding panel and a records panel.
To make a subdomain point to an IP address create a A-record with a TTL of 3600 seconds.
For now, just Google "my IP" and use that. In a subsequent step we'll get fancier.
Congratulations! You own a website!
Home internet connection
Given that 91% of homes in the UK have internet at home, this is a given.
However, you need access and open a port on your modem. Even the terrible Huawei modems are generally fine.
The router webpage is 192.168.1.1, 192.168.0.1 or 192.168.1.256 or somesuch. If you cannot find it and the router does not say, try the command
arp -a on a networked machine or open Network Preferences.
The reason is that you have to direct incoming traffic on port 80 to your server. This is called IP forwarding and is probably under Security. Most modems also allow port forwarding: that is your modem passes incoming port 80 traffic to port 8080 or 8888 or 6543 or whatever of the LAN IP address of your server. We will get to serving later.
Port 80 is the port for http protocol. It is "not secure" as Google Chrome reminds everyone: for the secure protocol things are more complicated and will be discussed later.
Port 80 is the port for http protocol. It is "not secure" as Google Chrome reminds everyone: for the secure protocol things are more complicated and will be discussed later.
Test
If you want to try it out now, you can temporarily run a Jupyter notebook with the flags--ip '*' -port 8888. As the warning tells you, this is not something one should do for long. If all is set up correctly you will see the notebook by typing your public IP address, either as it or, if you opened 8888, xx.xx.xx.xx:8888. As mentioned, Googling 'my IP' gives this address.
Alternatively, if you have a Raspberry Pi with Raspian installed, an Apache2 server should already be running. To see just type its IP address in your browser if you are in the same network.
Parenthetically, another port to look out for to forward is 22 for ssh. Once you have all set you would simply type
To counter this I have a hourly cron job to check all is okay and email me if not. This will be discussed in the section "IP crontab job".
SSH
Parenthetically, another port to look out for to forward is 22 for ssh. Once you have all set you would simply type
ssh name@www.mywebsite.com. You can also use a different port ssh name@www.mywebsite.com -p 24, allowing what is called "security by anonymity" if you change the ssh server's config. Some routers allow port knocking which is probably easier to set up.Dynamic IP
One major problem with a home router is that the IP changes every month or less, because most internet providers allocate dynamic IPs to residential users, while commercial users (who pay more) have fixed IPs (along with higher uploads).To counter this I have a hourly cron job to check all is okay and email me if not. This will be discussed in the section "IP crontab job".
Rasperry Pi
Install
If the Rasperry Pi came with a microSD and is formatted to Raspian all is good.If not, get a 4+ GB microSD and start downloading the OS. The program Etcher is good to burn the img file without worrying about formatting and naming the card correctly.
The Pi can be used headless (no monitor): to do so add a blank file called ssh to the root folder of the card before ejecting it.
touch /Volumes/boot/ssh from the terminal should work.A Pi 3 has WiFi included, but ethernet is a safer bet.
Login
Once it is plugged in find its IP address from your machine and login like this:arp -a
ssh pi@192.168.1.123It is also a good idea to give the machine a fixed IP in your router's DHCP table.
The default user is pi and the default password raspberry. Obviously, we want to change this:
passwdNow let's update everything...
sudo apt-get updatesudo apt-get upgradeIn the last year, Python3 installs smoothly on a Pi, including Pandas, which previously was a nightmare and required berryconda...
Berryconda
If for some reason, the apt-gotten python3 is causing you trouble try berryconda with the following command:wget https://github.com/jjhelmus/berryconda/releases/download/v2.0.0/Berryconda3-2.0.0-Linux-armv7l.shchmod +x Berryconda3-2.0.0-Linux-armv7l.sh./Berryconda3-2.0.0-Linux-armv7l.shAnswer yes to the request to
echo 'export PATH=/home/pi/berryconda3/bin:$PATH' >> /home/pi/.bashrcNow. Let's reload things and clean up.
source /home/pi/.bashrc
rm Berryconda3-2.0.0-Linux-armv7l.shIn terms of module to install using the
-r requirements.txt does not seem to work, so one has to type them manually, sorry.Pyramid or Django?

Pyramid has friendlier documentation than Django, but the latter is more powerful.
To start off with I would advocate using a Pyramid folder started from a cookiecutter.
Also, when serving HTML pages, it is insane not to use an HTML framework too, like Bootstrap or Google Materials.
When you do, you will find you cannot serve directly on port 80. For that we will need a Apache2.
Also, when serving HTML pages, it is insane not to use an HTML framework too, like Bootstrap or Google Materials.
When you do, you will find you cannot serve directly on port 80. For that we will need a Apache2.
Apache2
/var/www/html/index.html). If you configured the router as discussed above, you can find this page if you type your home IP address, or, if you have a domain pointing there, you will get it too!The apache server is a daemon that constantly runs and sorts out your incoming traffic. So you can have multiple different subdomains pointing to different machines and/or ports within the network.
It can also add SSL authentication, so your website is marked as "Secure" (https), but that requires the purchase of a SSL key (~£3/year).
There is a competing sever out there, Nginx, which, yes, is a tad better in terms of performance, but the documentation is terrible, the Pi has Apache already running and if you really cared about performance you would not be using a Pi in the first place.
So what we need to do is set up a "port-forwarding reverse-proxy virtual-host". Which is actually really simple. That is, setting it so all incoming requests for a specific address get forwarded to a given IP and port, which means you can have a single apache server redirecting many websites to many machines.
In the Pi do the following:
ls /etc/apache2/In there you will find lots of files and some folders. Any playing around happens in the *-available foulders. To activate an available file, the command
sudo a2enmod or a2ensite is needed followed by a server reset (sudo systemctl restart apache2). Apache2 gives hints on how to troubleshoot if something is wrong, which is very handy, however all the commands given need to be sudo'ed on a pi.In the sites available make a file say
personal.conf<virtualhost>
ServerAdmin myusername@localhost
ServerName mysubdomain.myowndomain.com
ProxyPreserveHost On
ProxyPass / http://localhost:xxxx/
ProxyPassReverse / http://localhost:xxxx/
</virtualhost>To enable it type sudo a2ensite personal.conf and activate the reverse proxy mods via sudo a2enmod mod_proxy mod_proxy_html.
The great thing is that you can copy this configuration and set up a different port for a different site you are running and all traffic will be redirected there.
In the case the pi is forwarding to a different machine. For example, I have
dev.matteoferla.com forward to my laptop, solely for when I want to remotely show something to someone outside the network. To do this, just change localhost to the internal IP of the machine —preferably fixed by the DHCP of the router.
IP crontab job
As soon as the router changes the IP, the website will be unreacheable. To fix this, I have written a script (below) that checks the IP address and changes the DNS accordingly.
I have my site bought by GoDaddy. This site has an API that allows this to be done. First register yourself for a key at developer.godaddy.com. Then alter a spare gmail account to allow 3rd party app access. Then copy the script below and change it accordingly.
Lastly, set up a crontab job to run the checker every hour, something like this:
sudo nano crontab -e0 * * * * python3 ~/Coding/IP_checker/IP_check.py >> ~/Coding/IP_checker/log.txt
0 * * * * if netstat -ltnp | grep ':8080'; then cd ~/Coding/Test_site; python app.py; else echo 'No'; fiHTML content
Now the only thing left is to write your HTML content itself and configure routes both client and server side.This is beyond the scope of this tutorial, but here are some pointers:
- Boostrap framework for your HTML/CSS: Boostrap
- JQuery for the Ajax request (this is the request to the server that does not refresh the page). Link: JQuery Ajax. Don't make an vanilla JS Ajax. AnglularJS also makes life easier, but if unfamilar with JS start with JQuery.
No comments:
Post a Comment